






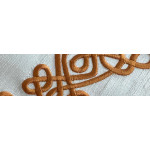


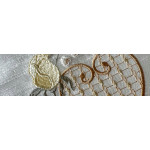


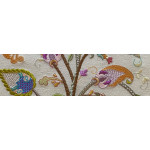


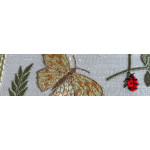








Using the Marianne 4 designs for a silk quilt Part 1

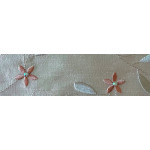
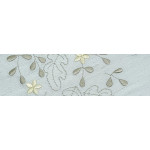
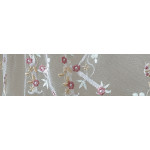
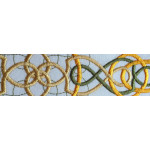
I was approached about creating suitable designs for borders for the Marianne Quilt blocks. It was exciting to return to these very popular designs, which have been used to embroider some fabulous quilts.
 |
Once I started digitising fresh designs, Marianne 4 became a large set containing not just border designs, but panels and some new 260mm x 260mm quilt blocks too, as we now have wider hoops! Since the designs have been released, I’ve seen the need for some to be altered slightly so that they can be easily embroidered on most borders. I created two possible combinations of designs for this set, and I will take you through the construction of one of them, which will help me check the border designs out and give you an idea on how to use them.
 |
I embroidered 6 of the new blocks on silk dupion with an embroidery batting behind them. For this particular project I used Bosal Stable Batt. I cut both the silk and the batting much larger than required as I wasn’t sure how wide I was going to trim the blocks before joining them with my favourite “Quilt as you go” method. At this point I did not add backing fabric. It can be done at this stage but also later if you want to hide the back of the embroidery. The embroidery batting eliminated the need for stabiliser. I used the same colour scheme for my blocks.
 |
After each block is stitched out, be sure to mark the top of each one carefully, as you want the grain of the silk to be the same overall. Silk dupion can fray, so I prefer to square off my embroidered blocks larger than I expect to join them. I use a Frixion marking pen, triple-checking everything before I cut. I’ve started creating a template to lay over the block just before I trim anything. I use my Sulky Soft n Sheer stabiliser for this, as I have plenty on a bolt. It doesn’t move around like tissue paper. I mark the centre and diagonal lines too. Past experience has taught me always to join my blocks with a 3/8 inch seam rather than the traditional ¼ inch one. It makes pressing so much easier and allows a little more leeway.
 |
Now is the time to place your backing behind the blocks. I fold half of it over and spray with temporary adhesive spray. Then I flatten it carefully beginning in the middle and working out to the sides. Once it is laying flat I do the other side. Embroidered blocks will need to be squared, as the embroidery and the quilting stitches will have pulled the fabric in. Measure every block both vertically and horizontally to find out which is smallest. They will vary depending on the amount of embroidery. When laying your ruler over the embroidery, do not just focus on the edges and corners—look at the placement of the embroidery elements on the diagonal as well. You may have to compromise a little due to the movement of the fabric. If you are working with silk, do not trim until it is absolutely necessary.
 |
Before joining my blocks, I trimmed away 3/8 inch of batting on the edges where there were going to be seams to avoid bulk. Be careful when you do this that the backing and the fabric are well out of the way. This method means that your seam will sit against the edge of the batting. Do not worry if a little is caught—it will not affect the finished quilt. This is how I decided to place my blocks.
 |
I offset the circular blocks to balance everything out!
 |
Here you see my first join. Upon careful inspection, you can see the holes in the silk from the outline alignment stitches. These can be removed somewhat with your nail or a Hera tool. Another option is to use them for further quilting lines to hold the backing in place. Always set your seams with your iron before pressing them open.
 |
I glue-baste the seams down before covering them with ¾ inch sashing, which I create using a bias maker or Pauline’s Quilter World sashing tools. The 1½ inch strips do not have to be cut on the bias. Before gluing the open seam and pressing the sashing in place, I mark 3/8 inch each side with my Frixion pen so I can see the channel. For this gluing I use Roxanne’s glue baste as it does not mess up my iron. It’s available in most countries, but there are other similar glues on the market.
 |
The Frixion pen is marvellous, but do test it out for yourself on your fabric. I advise this for all new notions. Trim the sashing 3/8 inch away from the seam edge at both ends to avoid bulk in the next seam. I check my alignment with some pins, but remove them before stitching. Make sure you have a good sharp needle for your topstitching. Stitch a ¼ inch away from the seam, going slowly and focusing on one part of the foot rather than on your needle. A stitch-in-the-ditch foot will give you great results too. I prefer to stitch from the top so that any discrepancies are on the back rather than the front. Of course, you could reverse this whole process and sew the seams on the back and place the sashing on the front, even opting for a contrast fabric.
 |
When it comes to joining the rows, I follow the same process, but I do spend more time carefully aligning the seams because this has been difficult in the past. They move so easily. I pin the edges across first so I can lift them up and check the alignment underneath. Then I pin each side of the sashing and replace the other pins with wonder pins. Having had so much trouble aligning rows of embroidery in the past, I find I get more success if I take my time and pin in abundance!
 |
Do use a walking foot for joining your embroidered blocks, or you may have an integrated dual feed as I do on my Epic 2. This will help the layers move under the foot evenly. I also stitch slowly and use a stiletto or the tip of a seam ripper to guide the fabric between pins. This has been a game-changer for me.
 |
As you can see, all my research, experimentation and hard work has finally paid off! The seams are perfectly aligned at last. I am grateful to the many YouTube contributors who have helped and inspired me on my “Quilt as you go” learning experience. Here you can see the six blocks perfectly combined, ready for the next stage in this project which I shall explain in the next blog.
 |
I am wondering whether any further quilting is required in the gaps and how to frame the blocks before adding the borders. I anticipate that the next stage will be more than a little challenging. Until then, thank you for visiting. If you have any questions, please email me rather than leave a comment for an immediate response.
Happy embroidering from Hazel